
Ceramic pots are popular for indoor and outdoor gardening due to their aesthetic appeal and durability. However, there may be instances when you need to create holes in ceramic pots without a drill. Whether you want to enhance drainage or add decorative elements, alternative methods are available. In this article, we will explore various techniques to make holes in ceramic pots without drilling, allowing you to easily modify your pots.
Introduction
Ceramic pots offer a beautiful and sturdy option for displaying plants and flowers, both indoors and outdoors. While many ceramic pots come with pre-drilled drainage holes, there may be situations where you want to create additional holes or modify existing ones. Traditional drilling methods involve using power tools, which may not be readily available or suitable for everyone. Fortunately, there are alternative techniques that allow you to make holes in ceramic pots without the need for drilling.
The Importance of Drainage in Ceramic Pots
Before we delve into the methods of making holes in ceramic pots, it’s crucial to understand the importance of proper drainage. Drainage holes in pots serve a vital function by allowing excess water to escape, preventing waterlogging and root rot. Without proper drainage, plants may suffer from oxygen deprivation and stagnant water, leading to root damage and plant death. Therefore, ensuring adequate drainage is essential for the health and vitality of your plants.
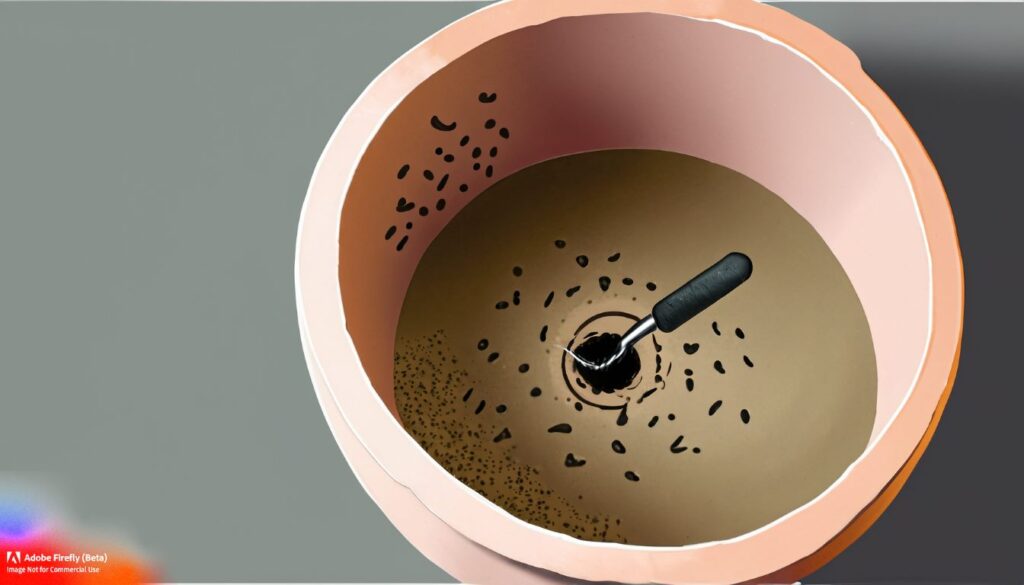
You can make drainage holes in ceramic pots without using a drill by applying alternative methods that rely on controlled pressure, heat, or specialized tools. These approaches are gentler but still require care to avoid cracking the pot.
1. Use a Nail and Hammer
Recommended
A simple way to create a hole using household tools.
- Place pot on a padded surface to absorb shock
- Mark the spot for the hole with a marker
- Tap gently with a masonry nail and hammer
- Rotate nail slightly to widen hole
2. Apply a Ceramic Hole Punch
Safe Option
Specialized hand tools designed for ceramics can pierce without cracking.
- Purchase a ceramic hole punch from craft or garden stores
- Position punch tip on marked spot
- Apply steady pressure until hole forms
3. Heat and Tap Method
Caution
Heat weakens ceramic slightly, making it easier to puncture.
- Warm the pot base with a candle or heat gun (not too hot)
- Place a sharp nail or awl on the spot
- Tap lightly with hammer to break through
4. Manual Tile Cutter
Alternative
Tile cutters can score and snap ceramic surfaces.
- Score the pot base with a tile cutter wheel
- Apply gentle pressure until a small hole forms
- Smooth edges with sandpaper
5.Use a Diamond File
Slow but Safe
Diamond-coated files can grind a hole gradually.
- Mark the hole location
- Rub file in circular motion over spot
- Continue until hole opens
- Smooth edges to prevent cracks
⚠️ Safety Tips
- Always wear safety goggles and gloves to protect from ceramic shards.
- Work slowly—ceramic is brittle and cracks easily under sudden force.
- Place pot on a soft, stable surface (like a towel or rubber mat) to absorb vibrations.
4 Alternative Methods for Making Holes
Hot Nail Method
The hot nail method is a simple technique that requires a nail and a heat source, such as a candle or gas stove. Here’s how to use this method:
- Choose the desired spot on the ceramic pot where you want to create the hole.
- Heat the nail by holding it over the flame until it becomes red-hot. Use pliers or tongs to handle the hot nail.
- Once the nail is heated, carefully press it against the chosen spot on the pot.
- Apply steady pressure and rotate the nail to create the hole. Be cautious of the hot nail and use protective gloves to handle it.
- Continue the process until the nail pierces through the ceramic, creating the desired hole size.
The hot nail method can be effective for creating small to medium-sized holes in ceramic pots. However, it’s important to exercise caution and perform this technique in a well-ventilated area.
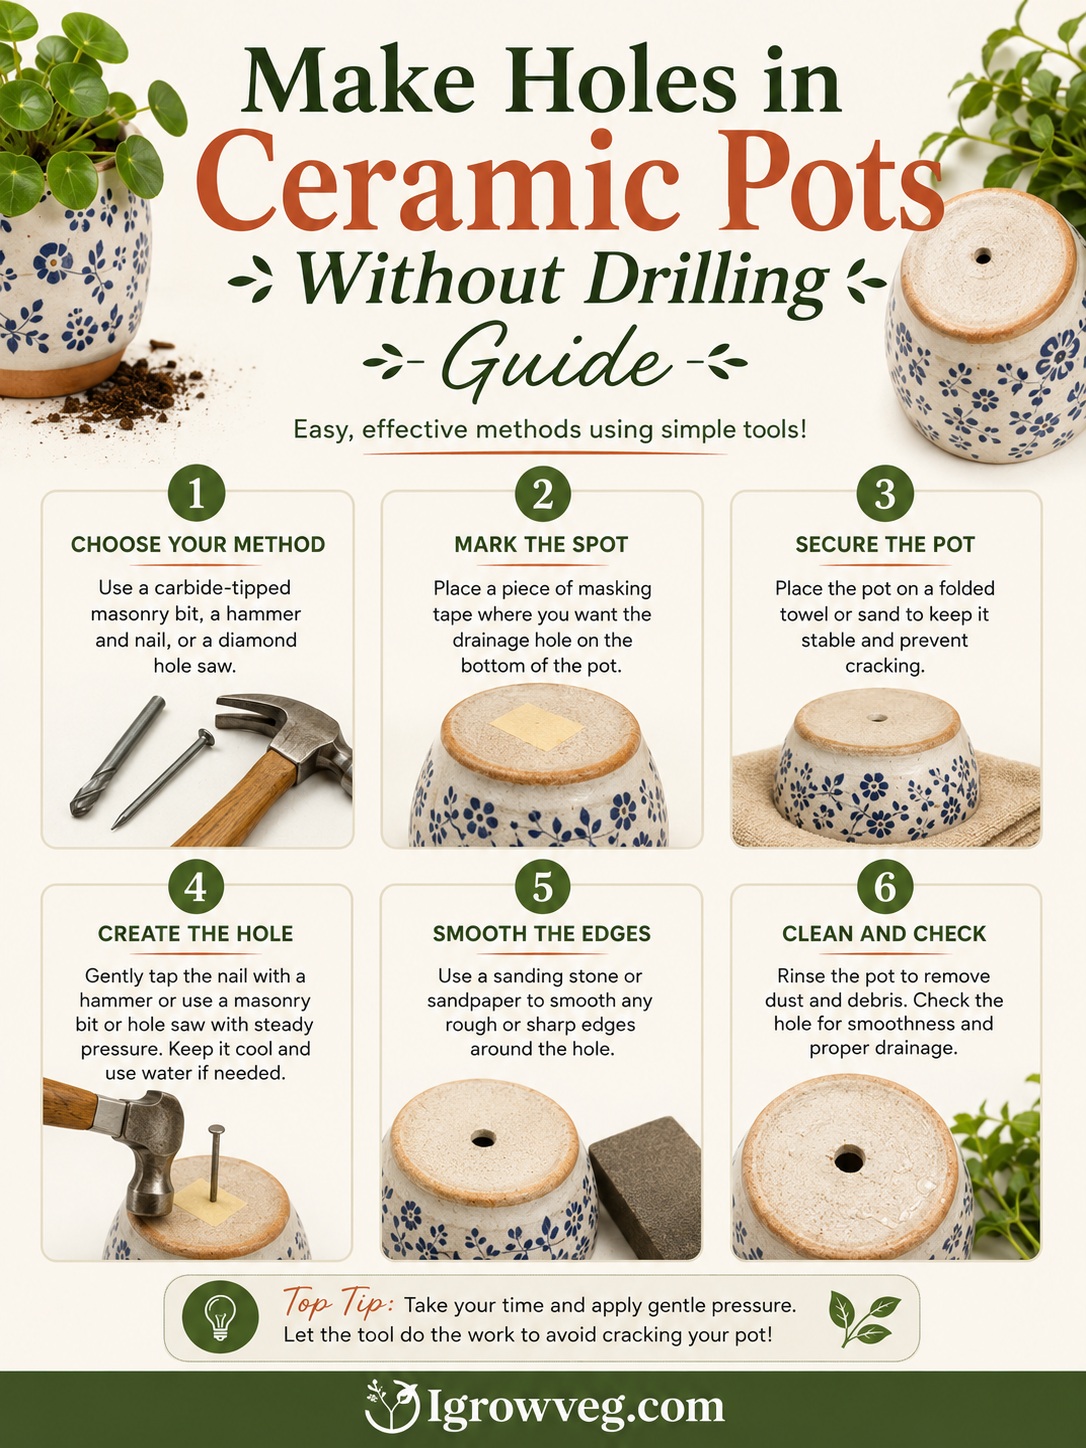
Hammer and Nail Method
The hammer and nail method is another straightforward technique that requires a hammer and a nail with a sharp point. Follow these steps:
- Place the ceramic pot on a sturdy surface, such as a concrete floor or a workbench covered with a thick cloth.
- Choose the desired spot on the pot where you want to create the hole.
- Position the nail on the chosen spot and gently tap it with the hammer.
- Continue tapping the nail with controlled force until it pierces through the ceramic.
- Adjust the pressure and speed to avoid damaging the pot or causing it to break.
The hammer and nail method can be effective for creating small holes in ceramic pots. However, it requires precision and control to avoid damaging the pot’s integrity.
Masonry Bit and Hammer Method
If you have a masonry bit and a hammer, you can utilize this method to create holes in ceramic pots. Here’s how to proceed:
- Place the ceramic pot on a soft surface, such as a piece of foam or a folded towel, to prevent it from cracking.
- Mark the desired spot on the pot where you want to create the hole.
- Attach the masonry bit to a power drill, ensuring it is suitable for drilling through ceramic.
- Position the masonry bit on the marked spot and gently tap it with the hammer to create a starting point.
- Once the starting point is established, drill at a slow speed with light pressure.
- Continue drilling, gradually increasing both speed and pressure until the bit breaks through the ceramic.
The masonry bit and hammer method requires patience, precision, and the use of appropriate safety equipment. It is recommended for larger-sized holes or when working with thicker ceramic pots.
Ceramic Hole Saw Method
For those looking to create larger or more precise holes, a ceramic hole saw can be a suitable option. Follow these steps:
- Place the ceramic pot on a stable surface and mark the spot where you want the hole.
- Attach the ceramic hole saw to a power drill, ensuring it is the appropriate size for the desired hole diameter.
- Position the hole saw on the marked spot and secure it in place.
- Start drilling at a slow speed with light pressure, allowing the hole saw’s diamond grit edges to cut through the ceramic.
- Maintain a steady pace, applying water as a lubricant to prevent overheating and ensure a smooth cut.
- Continue drilling until the hole saw has created the desired hole.
The ceramic hole saw method provides a precise and efficient way to create larger holes in ceramic pots. It is important to exercise caution, wear protective equipment, and keep the pot and saw lubricated throughout the process.
Precautions and Safety Measures
When using any of the methods mentioned above to make holes in ceramic pots without drilling, it’s important to keep the following precautions and tips in mind:
- Safety first: Wear safety glasses and protective gloves to protect yourself from any potential hazards.
- Start small: Begin with a small hole and gradually increase the size if needed. This allows for better control and reduces the risk of damaging the pot.
- Practice on spare pots: If you’re new to these techniques, it’s a good idea to practice on spare or inexpensive pots before attempting them on valuable or delicate ones.
- Be patient: Take your time and work slowly to ensure accuracy and prevent any mishaps.
- Use the right tools: Choose the appropriate nails, masonry bits, or ceramic hole saws for the size of the hole you want to create.
- Work on a stable surface: Place the pot on a stable surface to prevent it from moving or slipping during the hole-making process.
Choosing the Right Method for Your Pot
The choice of method for making holes in ceramic pots depends on various factors, including the size of the hole required, the thickness of the ceramic, and the tools available to you. Consider the following when selecting a method:
- Size of Hole: Determine the desired size of the hole based on your specific needs, such as drainage requirements or decorative elements.
- Pot Thickness: Thicker ceramic pots may require more substantial tools or techniques to create holes effectively.
- Tools Available: Assess the tools you have access to, such as nails, hammers, masonry bits, or ceramic hole saws.
Evaluate these factors and choose the method that aligns with your preferences and the characteristics of your ceramic pot.
Conclusion
Creating holes in ceramic pots without drilling is possible with alternative methods such as the hot nail method, hammer and nail method, masonry bit and hammer method, and the use of a ceramic hole saw. Each method requires careful execution and adherence to safety precautions. By following these techniques and tips, you can successfully make holes in ceramic pots for drainage or decorative purposes. Remember to practice on spare pots before attempting these methods on valuable or delicate ceramic pots.
Now you have the knowledge and confidence to modify ceramic pots without the need for a drill. Enjoy your gardening and creative projects!
FAQs
1. Can I use a regular nail for the hot nail method? Yes, a regular nail can be used for the hot nail method. However, it’s important to ensure that the nail is made of a material that can withstand the heat without melting or becoming damaged.
2. Will the ceramic pot crack when using the hammer and nail method? With careful tapping and controlled force, the ceramic pot should not crack. It’s important to choose a sturdy surface and avoid applying excessive pressure.
3. Can I use a regular drill bit instead of a masonry bit for the masonry bit and hammer method? Regular drill bits may not be effective on ceramic pots. Masonry bits are designed to cut through hard materials such as ceramic, porcelain, or stone.
4. How can I prevent the ceramic pot from moving during the hole-making process? Placing the pot on a stable surface, such as a rubber mat or a folded towel, can help prevent it from moving or slipping while using any of the methods mentioned.
5. Can I use these methods on other materials besides ceramic pots? While these methods are primarily designed for ceramic pots, they can also be used on other ceramic materials, such as tiles or dishes. However, the effectiveness may vary depending on the specific material and its thickness.