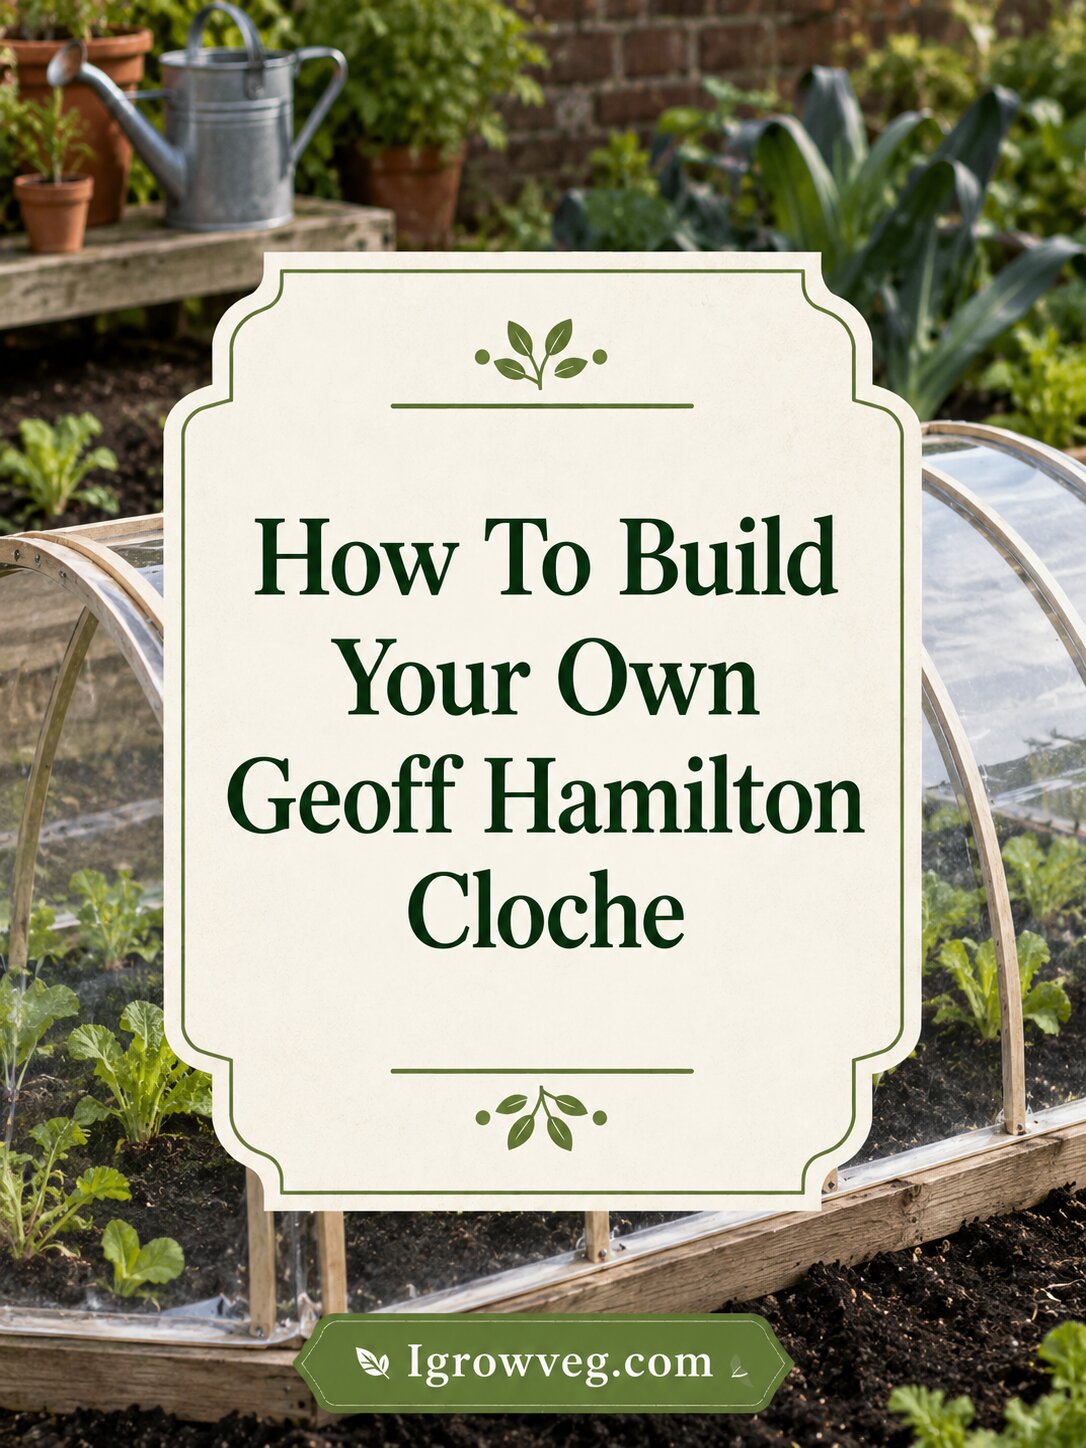
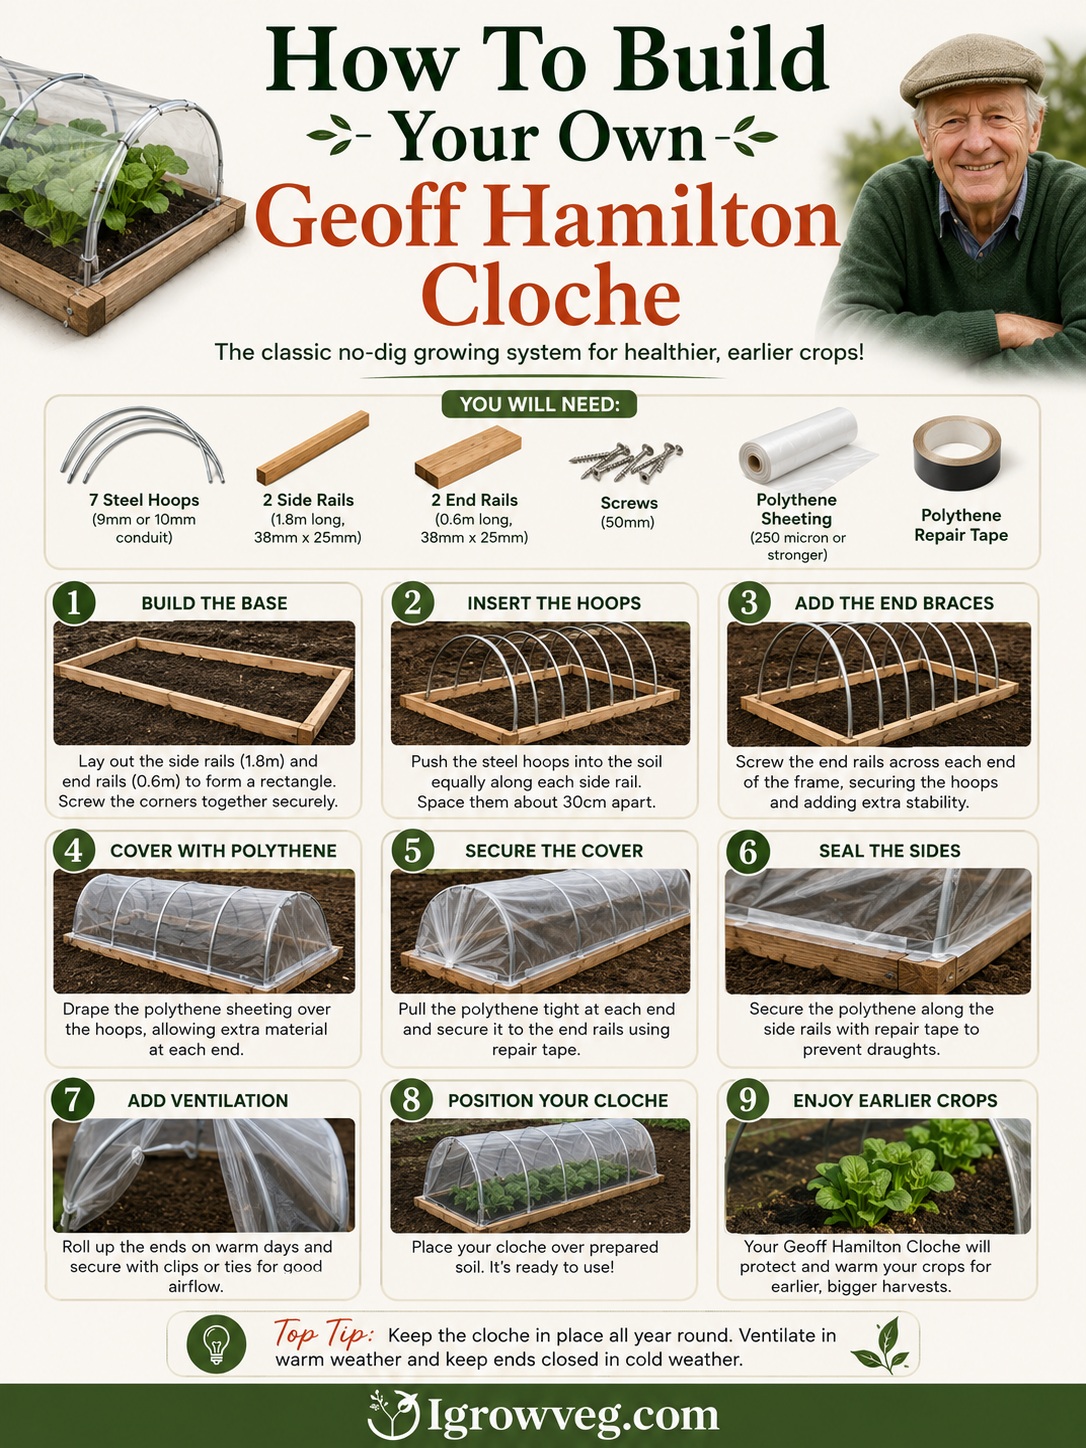
If you’re an avid gardener looking to add a practical and aesthetically pleasing element to your garden, building a ‘Geoff Hamilton’ Cloche could be an excellent weekend project. Inspired by the renowned gardener Geoff Hamilton, this cloche is designed to cover raised beds and help warm up the soil, providing an optimal environment for your plants.
Follow these step-by-step instructions to create your very own cloche:
Materials Needed:
- 2-inch by 2-inch Timber:
- 5 pieces cut to size (3 for the length and 2 for the width of the raised bed).
- Bracing Strips of Wood:
- 4 pieces for the corners.
- Galvanized Long Angle Brackets:
- 4 brackets and galvanized screws.
- Wooden Dowelling:
- 4 pieces (for 3 cloches, you can use 2 x 1m x 14mm dia Beechwood Dowelling).
- 14mm Flat Drill Bit and Drill:
- To bore shallow holes for dowelling.
- MDPE Blue Rigid Pipe:
- 20mm diameter (available from hardware stores).
- Enviromesh Netting:
- Purchase enough to cover the frame (3.6 x 6m for 2 cloches is a good estimate).
- Staple Gun and Staples:
- A large staple gun to secure the netting.
- Procol Fencecote 225ml:
- A non-toxic, non-flammable water-based wood protection paint or similar product.
Instructions:
- Build the Timber Frame:
- Arrange the 4 pieces of timber in a square or rectangle shape.
- Use angle brackets and bracing strips to fix the timber together.
- Prepare Dowelling:
- Using the 14mm drill bit, bore shallow holes in each corner of the timber frame.
- Cut the dowelling to the desired length and glue into the bored holes.
- Attach MDPE Pipe:
- Place one end of the pipe over a dowel and measure and cut the piping to the desired height of the cloche.
- Push down the pipe onto the dowelling on one side and repeat on the other side of the frame.
- Fix Top Baton:
- Secure the top baton onto the blue piping with screws to form a rigid frame.
- Protect the Frame:
- If using Procol Fencecote, dilute it with water as directed, then give the frame two coats and leave it to dry overnight.
- Attach Enviromesh Netting:
- Open the Enviromesh netting and place it over the frame, leaving enough to cover the sides.
- Fold the netting under the frame, starting with the smallest sides.
- Ensure the netting covers all parts of the frame and use the staple gun to pin the netting to the frame on the sides or underneath for neatness.
- Finish and Place on Raised Bed:
- When it comes to the corners, fold the netting inwards and staple again or trim to size and staple in place.
- Place the new cloche onto your raised vegetable bed.
This DIY cloche provides protection for your plants, regulates temperature, and offers a controlled environment for optimal growth. Remember to lift it when necessary for sowing, harvesting, or weeding, and watering can be done through the netting. Happy gardening!
Garden Cloches: Types and Uses
A garden cloche is a protective covering designed to shield plants from adverse weather conditions and promote optimal growing conditions. These structures come in various types, each serving specific purposes in gardening. Here are some common types of garden cloches:
1. Glass Cloches:
- Material: Typically made of glass or clear plastic.
- Design: Resembles a small, elongated dome.
- Purpose: Retains heat, protects plants from frost, and creates a mini-greenhouse effect. Ideal for early-season seedlings.
2. Polythene Cloches:
- Material: Constructed from polythene or similar plastics.
- Design: Can be simple tunnels or larger structures.
- Purpose: Offers protection from frost, wind, and pests. Tunnels are excellent for rows of plants.
3. Bell Cloches:
- Material: Made of glass, plastic, or even fabric.
- Design: Bell-shaped, with a wide base and a narrow top.
- Purpose: Protects individual plants or small groupings. Creates a microclimate for warmth.
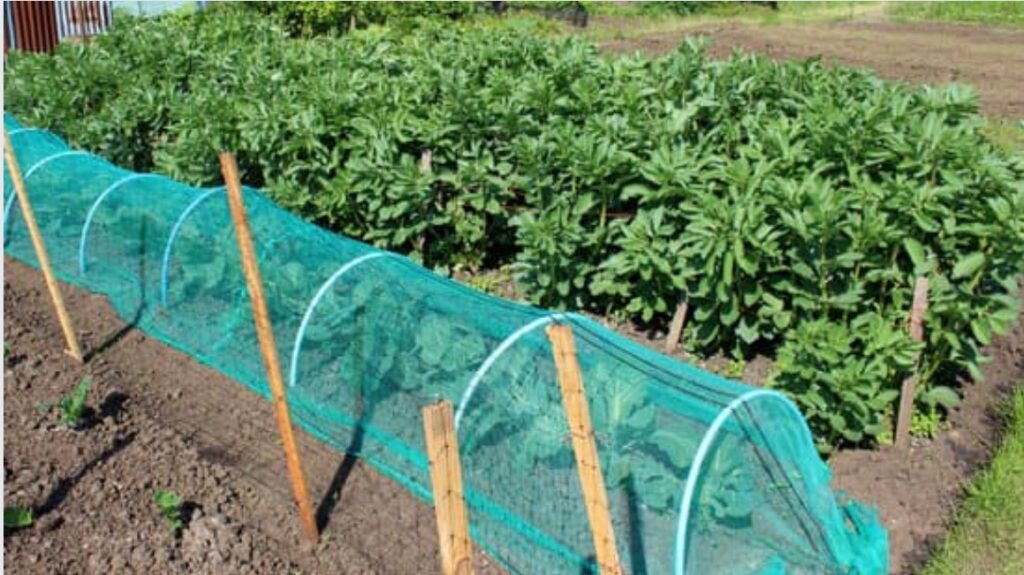
4. Enviromesh Cloches:
- Material: Utilizes fine mesh fabric.
- Design: Can be tunnel-shaped or cover specific plants.
- Purpose: Acts as a barrier against pests while allowing air and water through. Ideal for organic gardening.
5. Wire Cloches:
- Material: Features a framework of metal or wire.
- Design: Various shapes, often dome-like or rectangular.
- Purpose: Offers protection from animals, birds, and some weather elements. Allows for air circulation.
6. Plastic Cloches with Ventilation:
- Material: Plastic with adjustable vents.
- Design: Resembles a mini-greenhouse with vents.
- Purpose: Provides controlled temperature and humidity. Vents allow for airflow regulation.
7. Row Cloches:
- Material: Can be glass, plastic, or fabric.
- Design: Long structures covering rows of plants.
- Purpose: Protects entire rows from frost, wind, and pests. Ideal for extending the growing season.
8. Homemade Cloches:
- Material: Variable, often using recycled materials.
- Design: Customizable based on available materials.
- Purpose: Budget-friendly options for protecting plants. Examples include DIY plastic bottle cloches.
9. Cloche Hoops:
- Material: Hoops made of metal or plastic.
- Design: Arch-shaped supports.
- Purpose: Supports various types of covering materials, such as plastic or fabric, to create a tunnel effect.
10. Cloche Systems with Raised Beds:
- Material: Can incorporate various materials for the frame and cover.
- Design: Integrated with raised beds.
- Purpose: Combines the benefits of raised bed gardening with protective cloches for optimal plant growth.
Benefits of Using Garden Cloches:
- Frost Protection: Prevents frost damage to tender plants during chilly nights.
- Pest Control: Acts as a barrier against insects, birds, and small animals.
- Temperature Regulation: Creates a microclimate, allowing for controlled temperature and humidity.
- Season Extension: Enables gardeners to start planting earlier in the season and extend the growing season into late fall.
- Moisture Retention: Reduces water evaporation, ensuring plants receive consistent moisture.
- UV Protection: Shields plants from intense sunlight, preventing sunburn and heat stress.
Garden cloches are versatile tools that cater to the specific needs of plants and gardening preferences. Whether protecting delicate seedlings or extending the growing season, choosing the right type of cloche enhances the overall success of your garden.
Additional Tips:
- Cloche and Wildlife:
- Be mindful not to trap cabbage white butterflies under the cloche, as they may lay eggs on your plants.
- If propping the cloche open, check for bees and flying insects, freeing them to ensure proper pollination.
Frequently Asked Questions (FAQs) – ‘Geoff Hamilton’ Cloche
1. What is the purpose of a ‘Geoff Hamilton’ Cloche?
- The cloche, inspired by gardener Geoff Hamilton, serves to cover raised beds, creating a warmer environment for the soil and providing protection for plants.
2. Can I customize the size of the cloche for different raised beds?
- Yes, you can adjust the dimensions of the timber frame and piping to fit the specific size of your raised bed.
3. Why use Enviromesh netting, and where can I purchase it?
- Enviromesh netting is chosen for its effectiveness in providing protection while allowing air and light to reach plants. It can be purchased from gardening supply stores or online.
4. Is the Procol Fencecote paint necessary for the cloche?
- While not mandatory, the paint adds a protective layer to the wooden frame. It is recommended for durability and longevity, especially if the cloche will be exposed to the elements.
5. Can this cloche be used for all types of plants?
- Yes, the cloche is versatile and can be used for various plants, providing a controlled environment suitable for germination, growth, and protection from pests.
6. How do I lift the cloche for tasks like sowing and harvesting?
- The cloche is designed to be lifted easily when needed. Simply raise it to access the plants for tasks such as sowing, harvesting, or weeding.
7. Can I water my plants through the Enviromesh netting?
- Yes, watering can be done through the netting without the need to lift the cloche. The netting allows water to reach the plants while providing a barrier against pests.
8. What tools and skills are required for building this cloche?
- Basic woodworking tools such as a saw, drill, and screwdriver are needed. The project requires some DIY skills, but the instructions are designed to be user-friendly.
9. Is the cloche suitable for year-round use?
- The cloche is effective in providing warmth to the soil, making it suitable for extending the growing season in cooler months. However, its use may vary based on specific climate conditions.
10. Can I dismantle the cloche for storage during certain seasons?
- Yes, the cloche can be dismantled if you wish to store it during seasons when it is not in use. This adds convenience and allows for easy assembly when needed.